Also available in:
It is not always easy to collect all of your users’ needs, especially when you are not necessarily familiar with the context of use or the field in which they work. That’s why we created this downloadable and printable canvas to help you collect needs.
Context of the research
Julie and I worked for CapitalatWork Foyer Group, a discretionary investment management company. The goal of our intervention was to understand why their existing tools did not meet the needs of the portfolio managers (our end users).
But before we could address the question of “why”, we needed to better understand the context and identify their work habits while understanding their daily lives. Thus, we would have bits of “what”, “who” and “how” that would most certainly allow us to find leads on the “why”.
We wanted to make it easier for our users, and bring a bit of fun too. We looked at creating a card game fast enough to help our managers work with us on this exercise.
We had one day to conceptualize them, pre-test them, make them, print them, cut them out and test them the next day.
Context of use of our User Task Cards
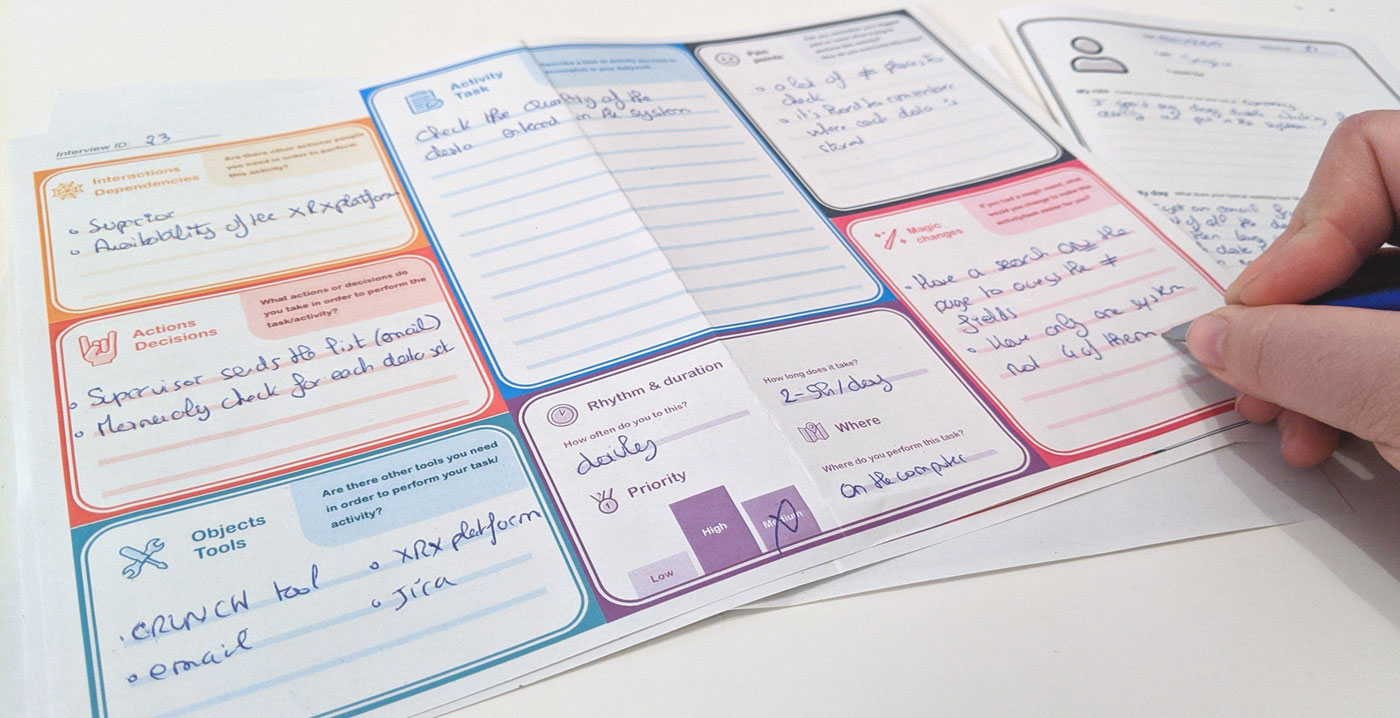
To help our managers, we organized a small workshop with two of our end users, blocked 1 hour for the exercise. In hindsight, the time was not enough and we overran by 15 minutes, where it would have taken 1h30 instead.
Introduce the concept
When you do something unusual with your users, it is important to introduce the context.
- Remind the context of the workshop (collecting their work habits)
- Announce that you will use cards to help them.
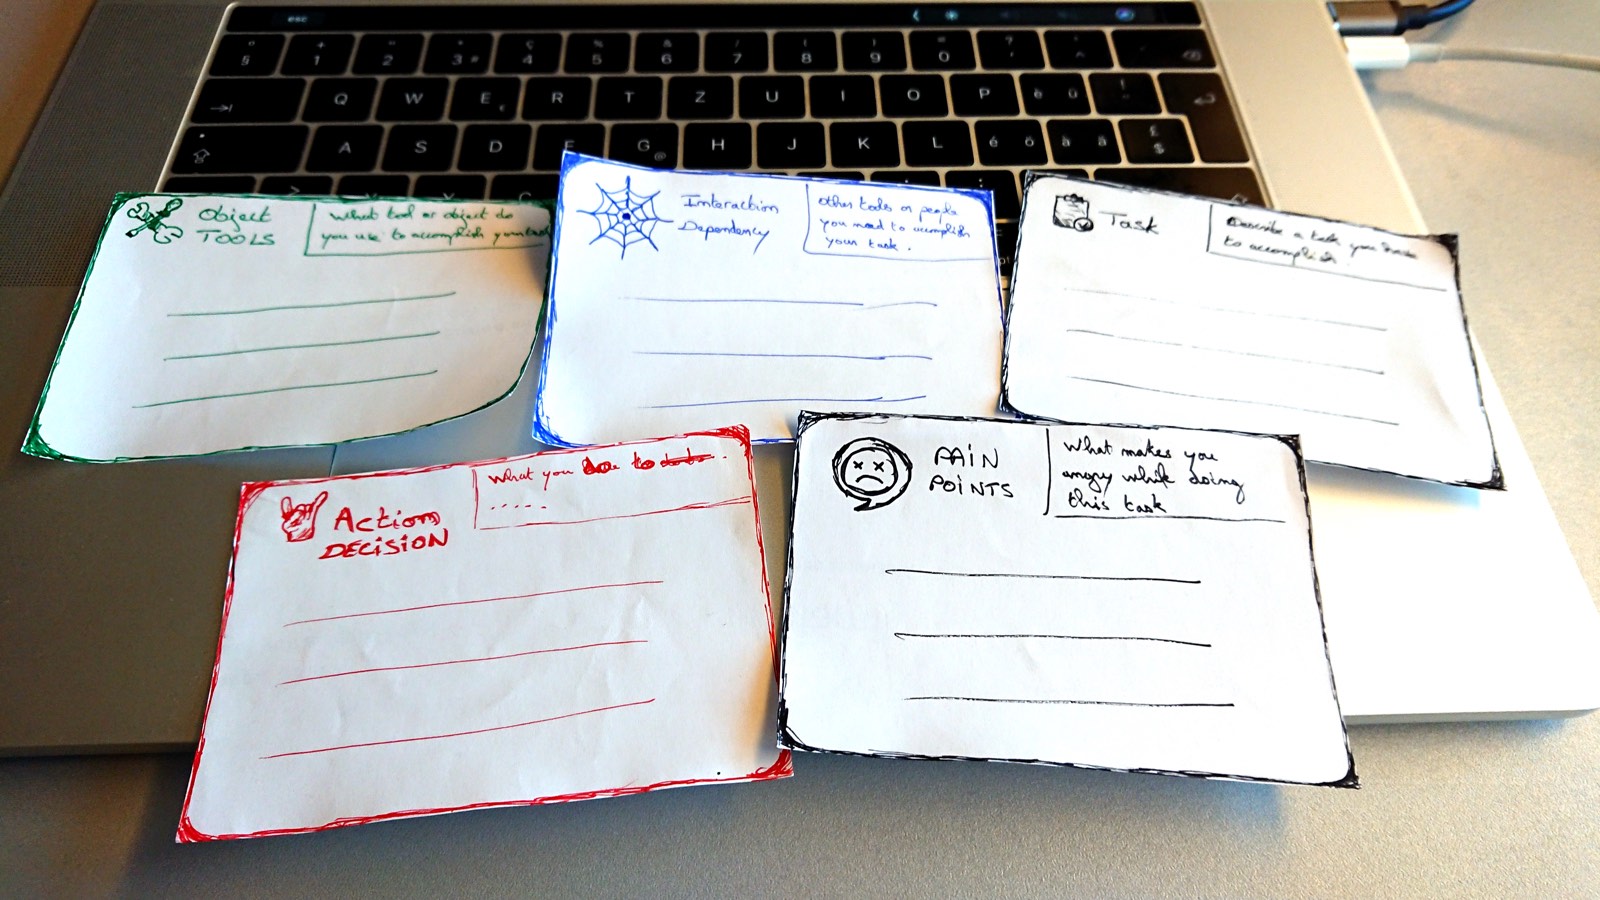
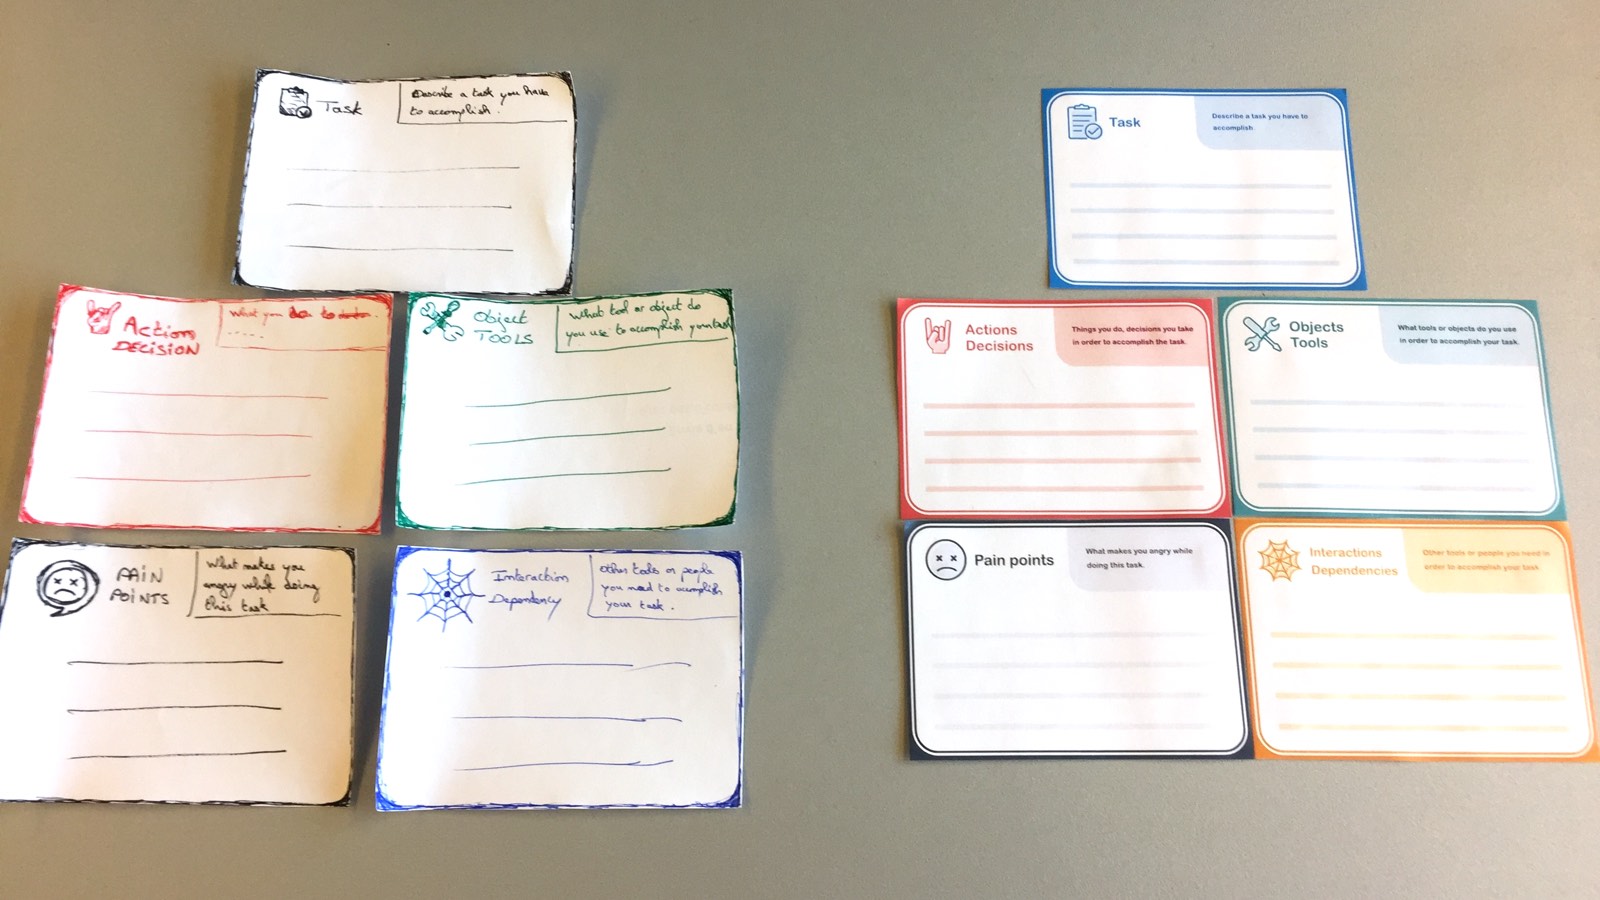
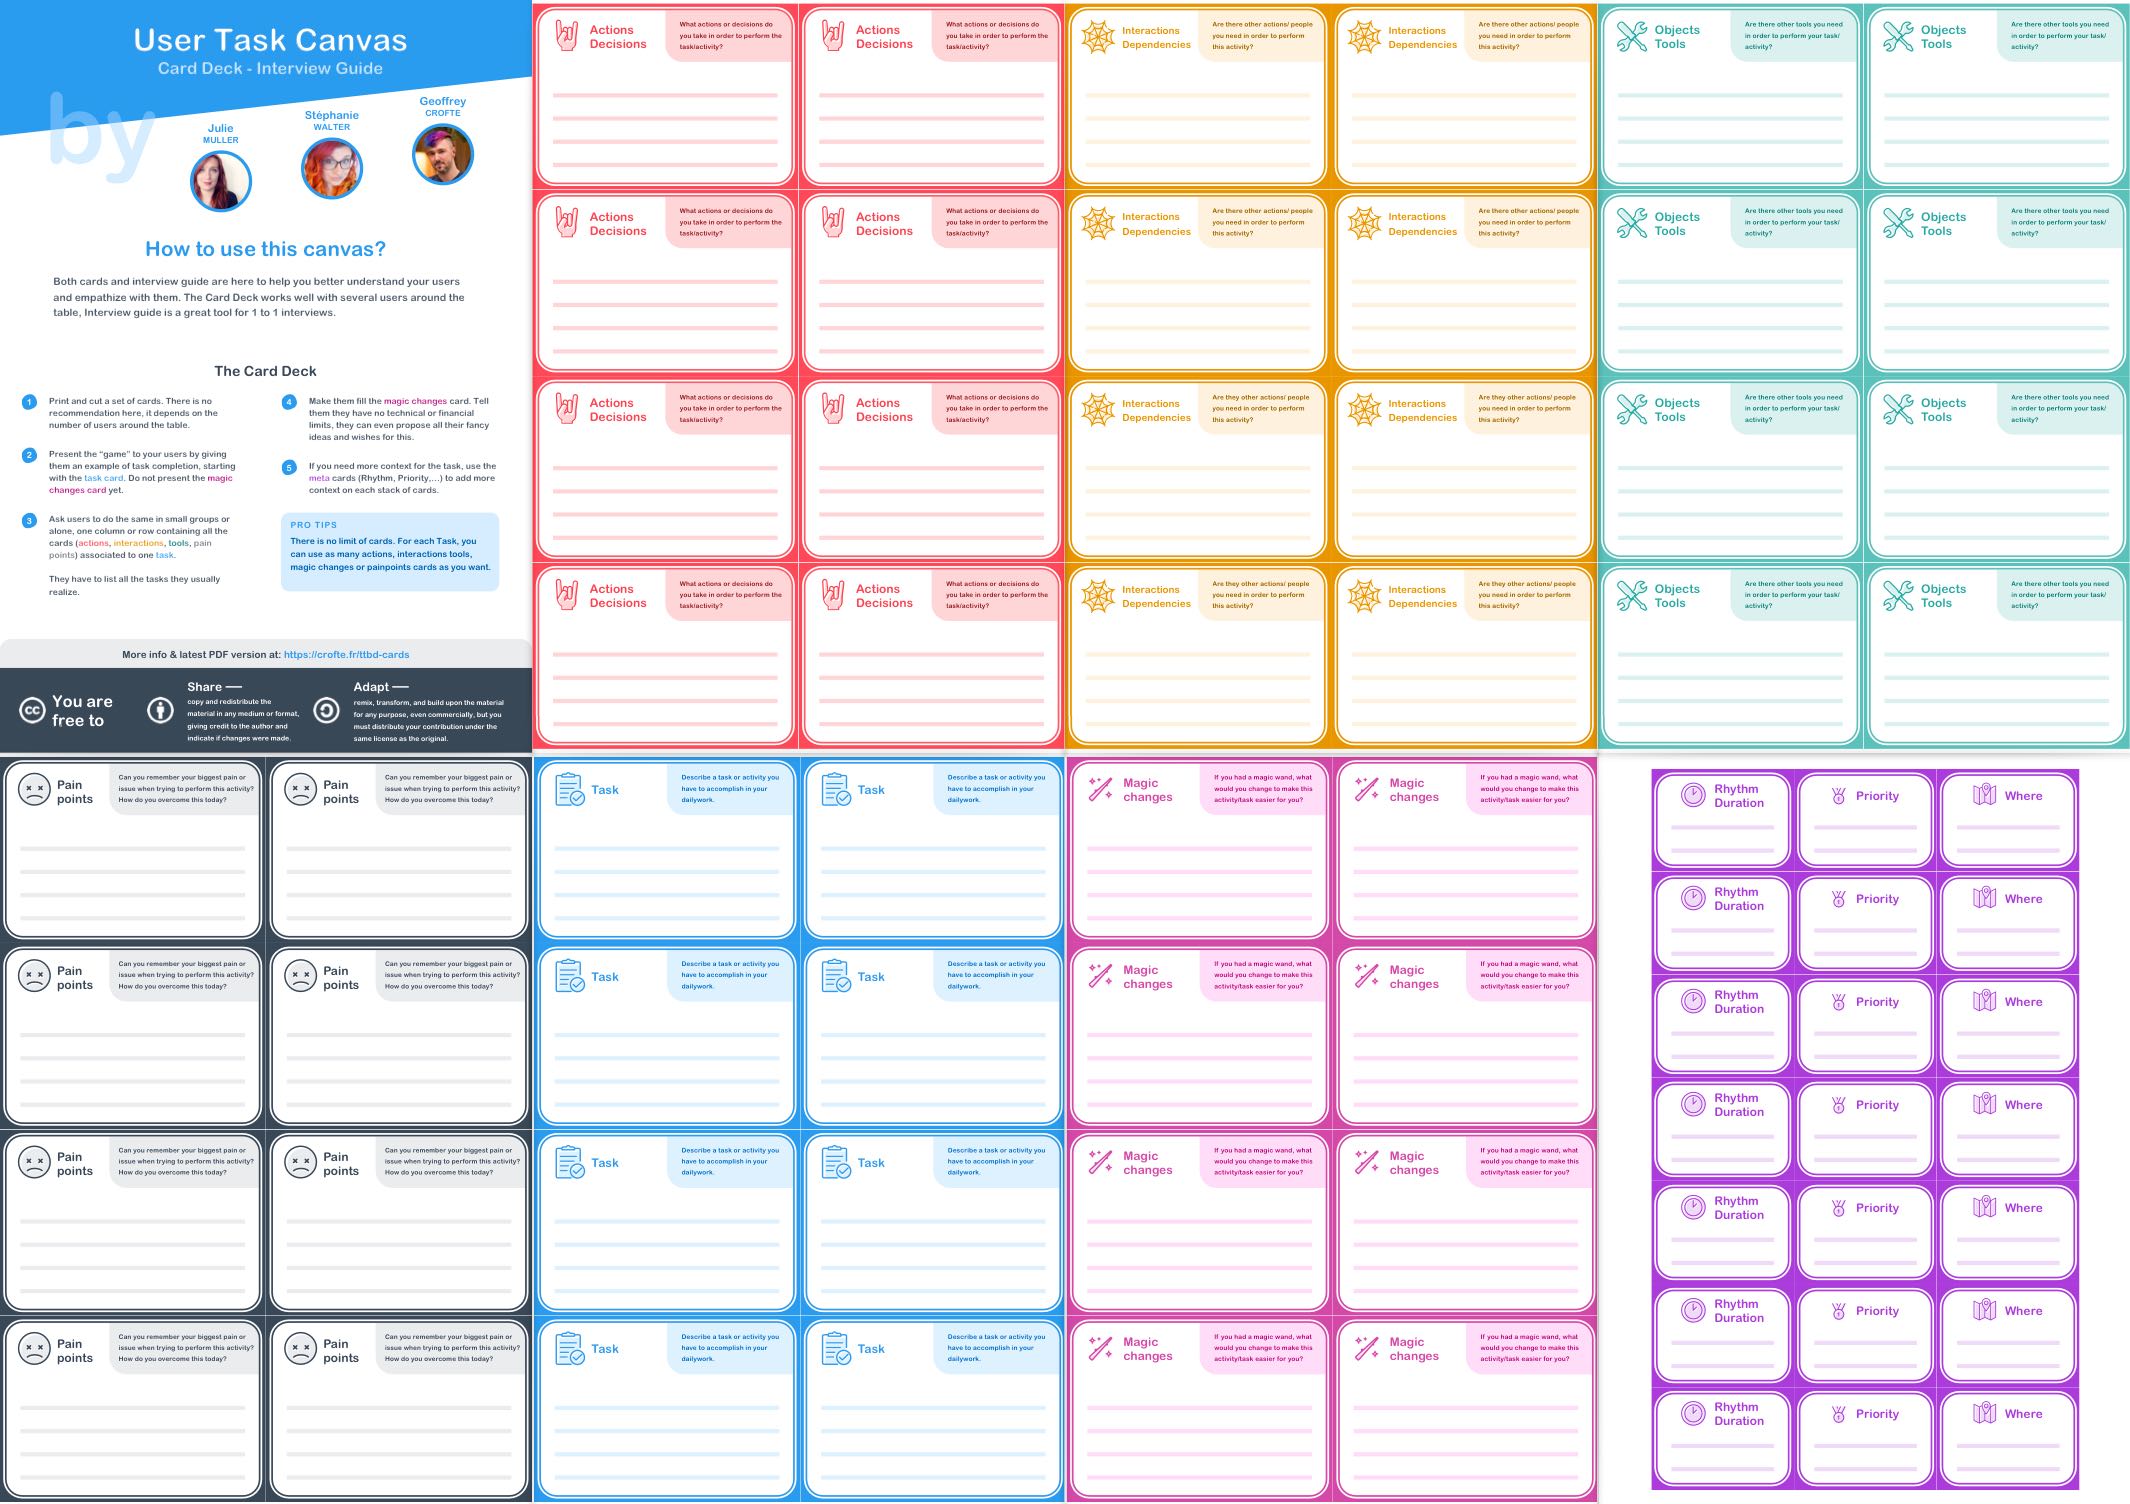
- Introduce the cards : Task, Actions/Decisions, Objects/Tools, Interactions/Dependencies. We voluntarily did not introduce the Pain Points, Magic Changes and Meta-cards right away (they’re not all here in the previous images, by the way.) .
- Then present an example that is quite simple to understand from everyday life. We used the example of “Taking a shower” which generally speaks to all our users.
When you run your example you need to remind yourself what each card implies and propose an order to present these cards. Order that will not necessarily be respected by your users and that’s totally fine.
- Task : this is the task you need to perform. You normally filled in this card with a “I need to take a shower”.
- Actions/Decisions : it is about defining what you do to accomplish this task, and the decisions you need to make to accomplish the task. “I turn on the water”, “I wait for the hot water”, “I adjust the type of jet”, are possible options.
- Tools/Objects : it is about specifying the tools and objects that you use to accomplish the task. “A washcloth”, “soap”, “a sponge” or “a towel” can be useful objects.
- Interactions/Dependencies : it is about providing more context to your task by reminding yourself of the people or other activities on which you depend. “The boilers”, “The cleanliness of the towel”, “The good maintenance of the siphon” can be dependencies.
Our initial mistake was to think that our users could fill out the cards Pain Points and Magic Changes later. In fact, they needed to express what bothers them early on. Give them this card early on by presenting it at the beginning, preserve the card Magic Changes for later.
- Pain Points : it represents the blocking or irritating points during the performance of the task. Usually it fills almost all by itself when you talk about tools, objects, interactions and dependencies. “Shower slips”, “Water is cold”, “Moisture rises quickly” can be pain points.
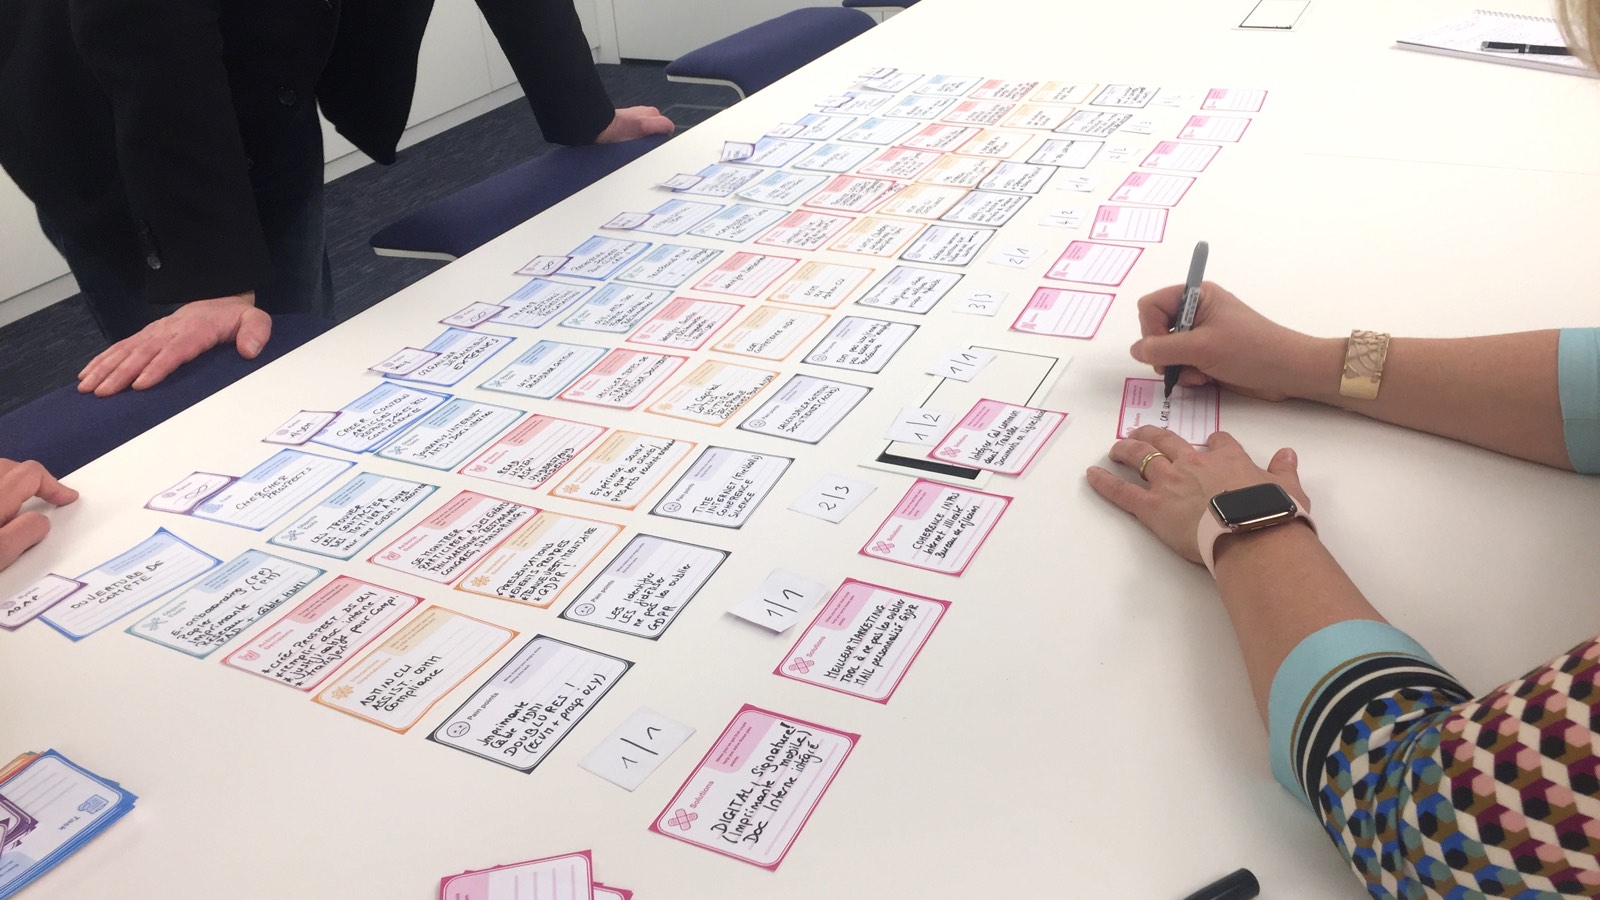
Conduct of the workshop
Once the presentations were made, we suggested that managers complete a few task cards to list them.
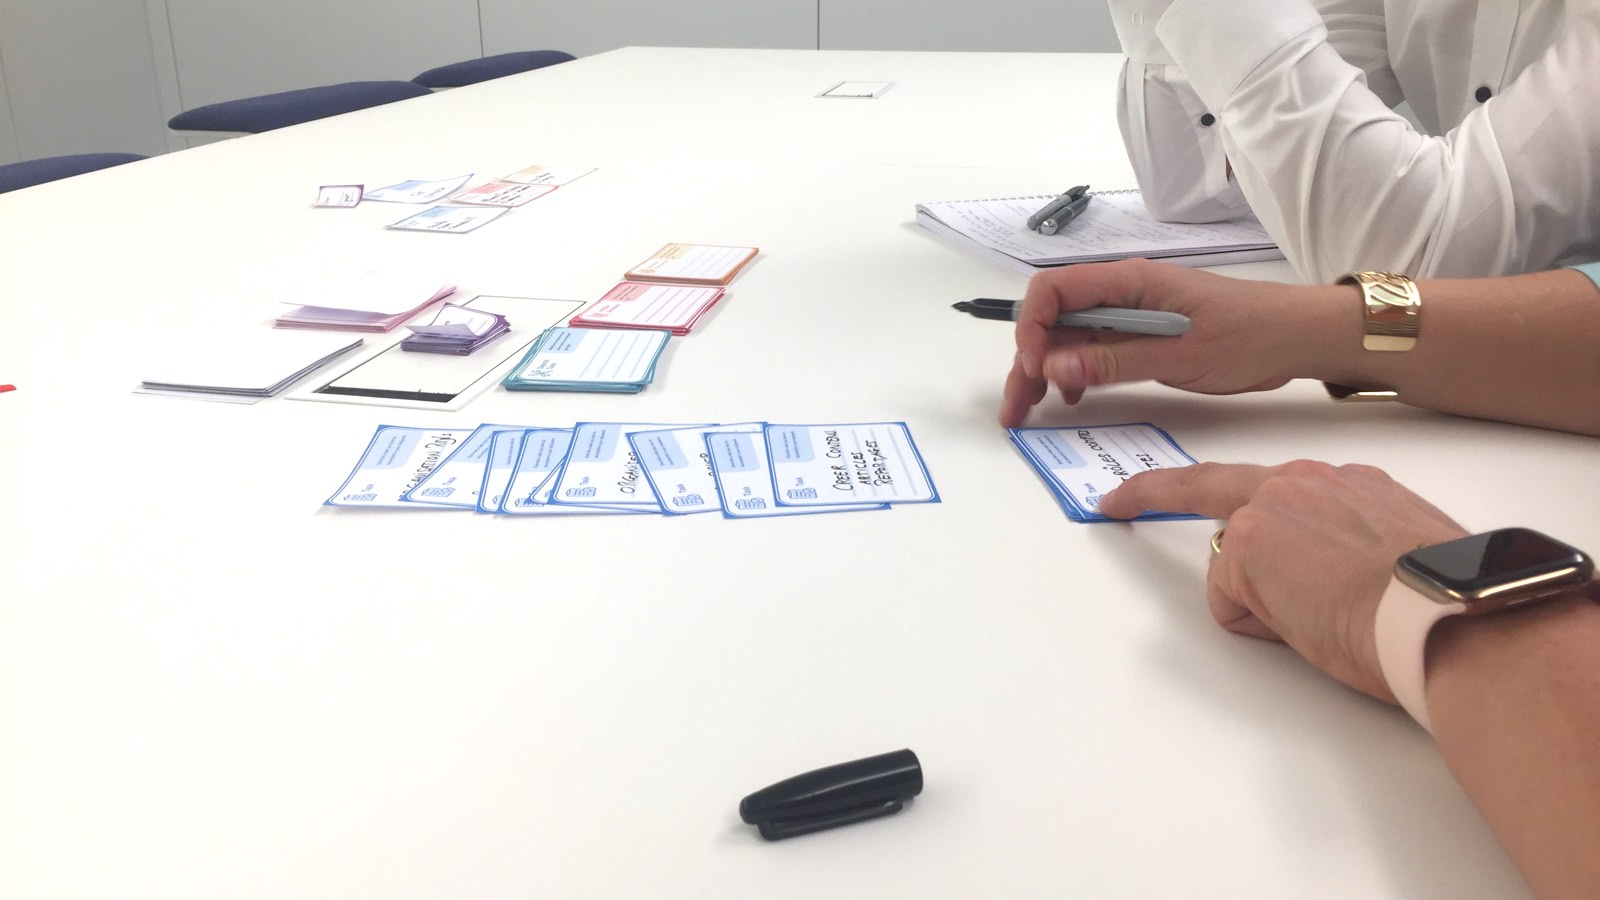
However, as they filled them out, they remembered the dependencies and tools they use. We ended up giving them free access to all the cards so that they could express themselves freely. They quickly took the tool in hand. We started making them work together.
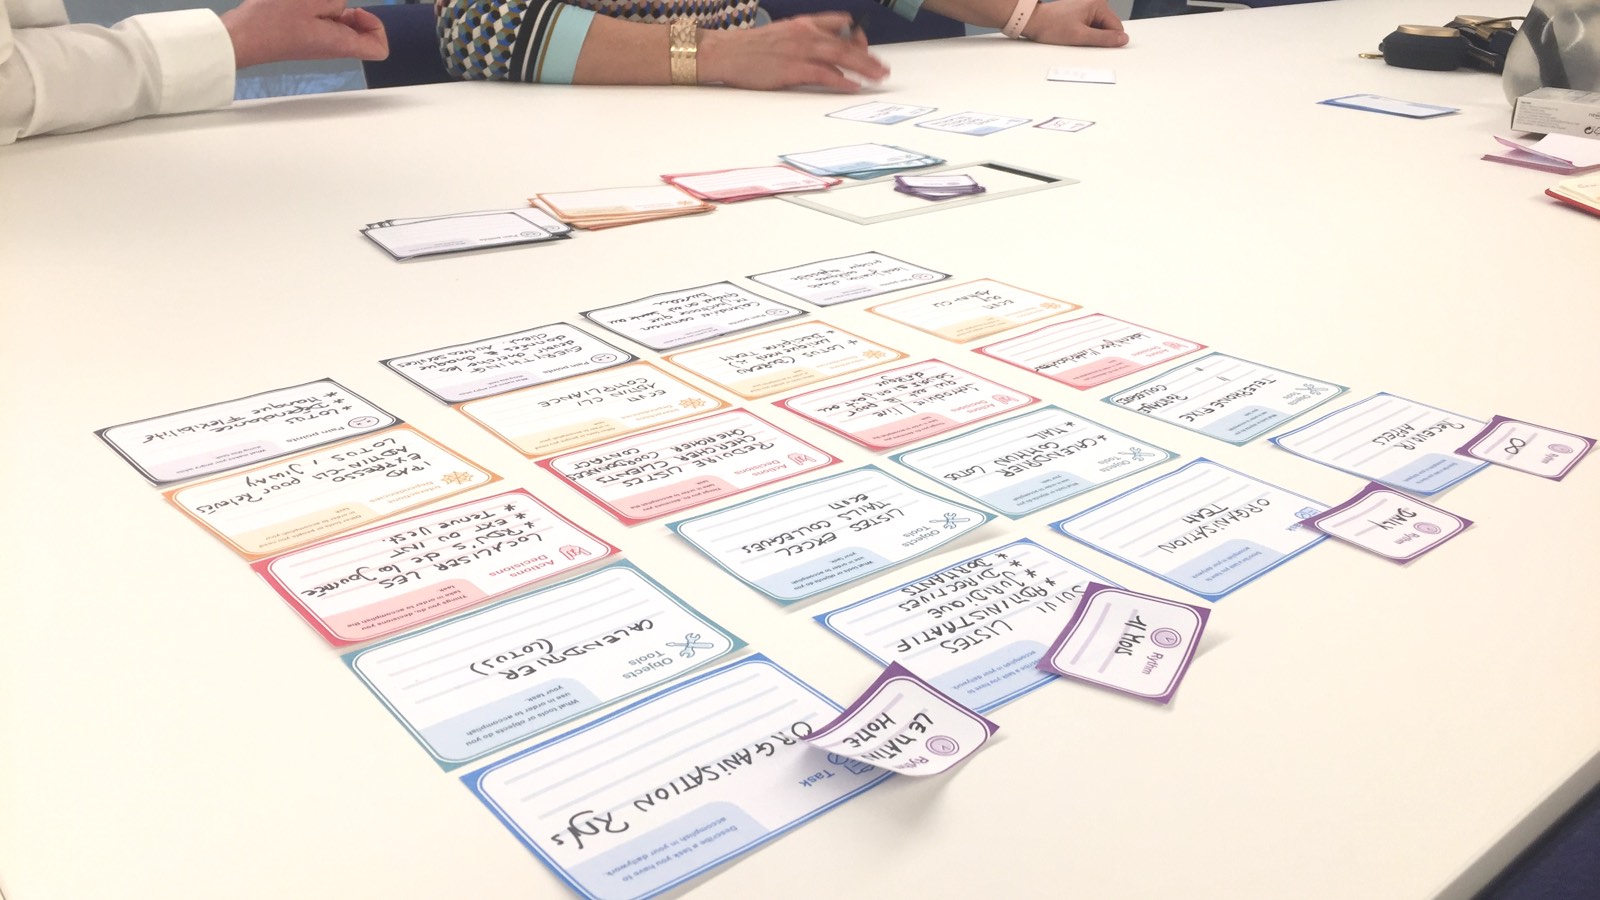
In order to help them, we completed, while listening to them, the meta-cards, which offer more context to a given task. We only had the “Rhythm” card at that time, but we quickly realized the need for the “Where” and the duration.
After a while, and because sometimes someone may take the lead in the group, we ended up separating the two managers to get more tasks and allow everyone to use their own memory.
At the end of the workshop, we offered the “Magic Changes” card so that the user could imagine their own solution for the Pain Points encountered. At that time we took the example of the shower to present the concept to them. “Having a small auxiliary water-heater”, “Porous shower floor” or “motorized ventilation” can be solutions to the pain points in our shower story.
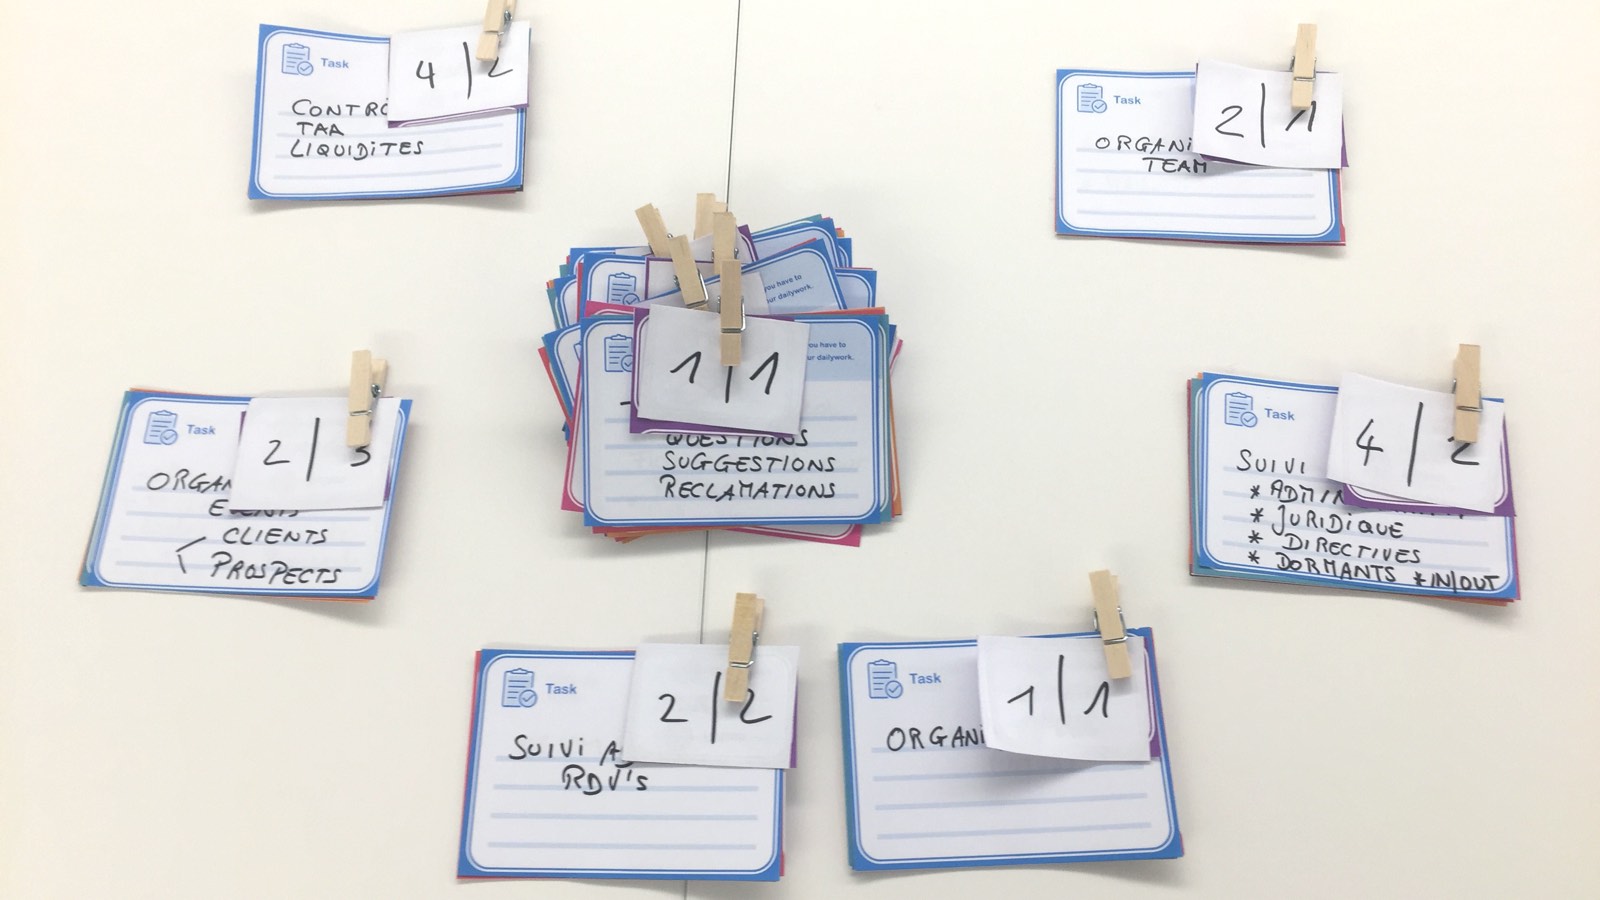
Once it’s done, group your columns into small stacks for quick access to task information. We used small wooden clamps that are much more practical than paper clips here.
We obviously had not anticipated everything for this workshop, so here are some additional tips.
Some tips for this workshop
These tips are quite generic. Depending on your users and the context of your work, you will certainly need to adapt the exercise a little. A few things we have seen.
- Plan at least 1h30 with two users working with you,
- Be at least 2 designers, it’s easier to support users and not forget anything. Especially if you want to take notes during the session,
- Present all cards from the beginning, including Pain Points, but except the Magic Changes card, which should be kept for the end.
- Arrange tasks by column or row to facilitate the completion of each task.
- You can help to fill in the context cards: “duration”, “where”, “rhythm” without any risk while listening to your users.
- Your users will probably highjack the game and do what they want with it. Unless you lose too much material because of this hacking, let them do it and be flexible. The important thing is to make it more fun for them and to create an automatism while not forgetting anything.
Experience feedback
At Foyer (the company I work with), we work in an Agile context. We develop features piece by piece, and we test them at each iteration with our end users. Each development comes from a need that we discovered thanks to this workshop and a proper story mapping.
After a few months of development and several weeks of use, the feedback is more than positive and the adoption of the tool is unequivocal: excellent. One of the many verbatim comments from our users that has brought me the most as a researcher is:
It’s surprising, you’ve managed to understand our business without knowing anything about it at first.
— a user
Download the User Task Cards for free
You will find the latest version of the cards available for free here. Be aware of the license.
This is a version 1.0 that I will update over time based on the feedback and improvements that we receive.
User Interview Guide
After a first session with these cards, I presented the concept to Stéphanie Walter. She modified it to create a user interview guide.
Presentation of the User interview guide
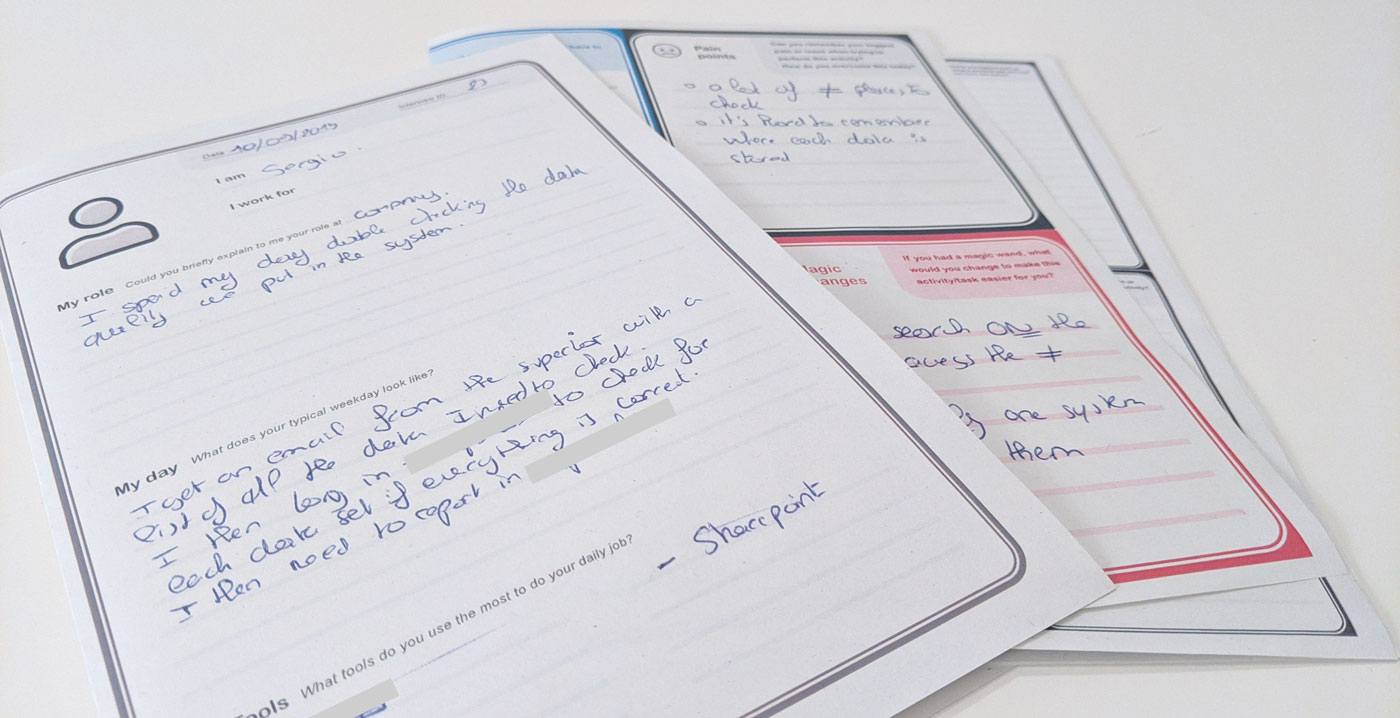
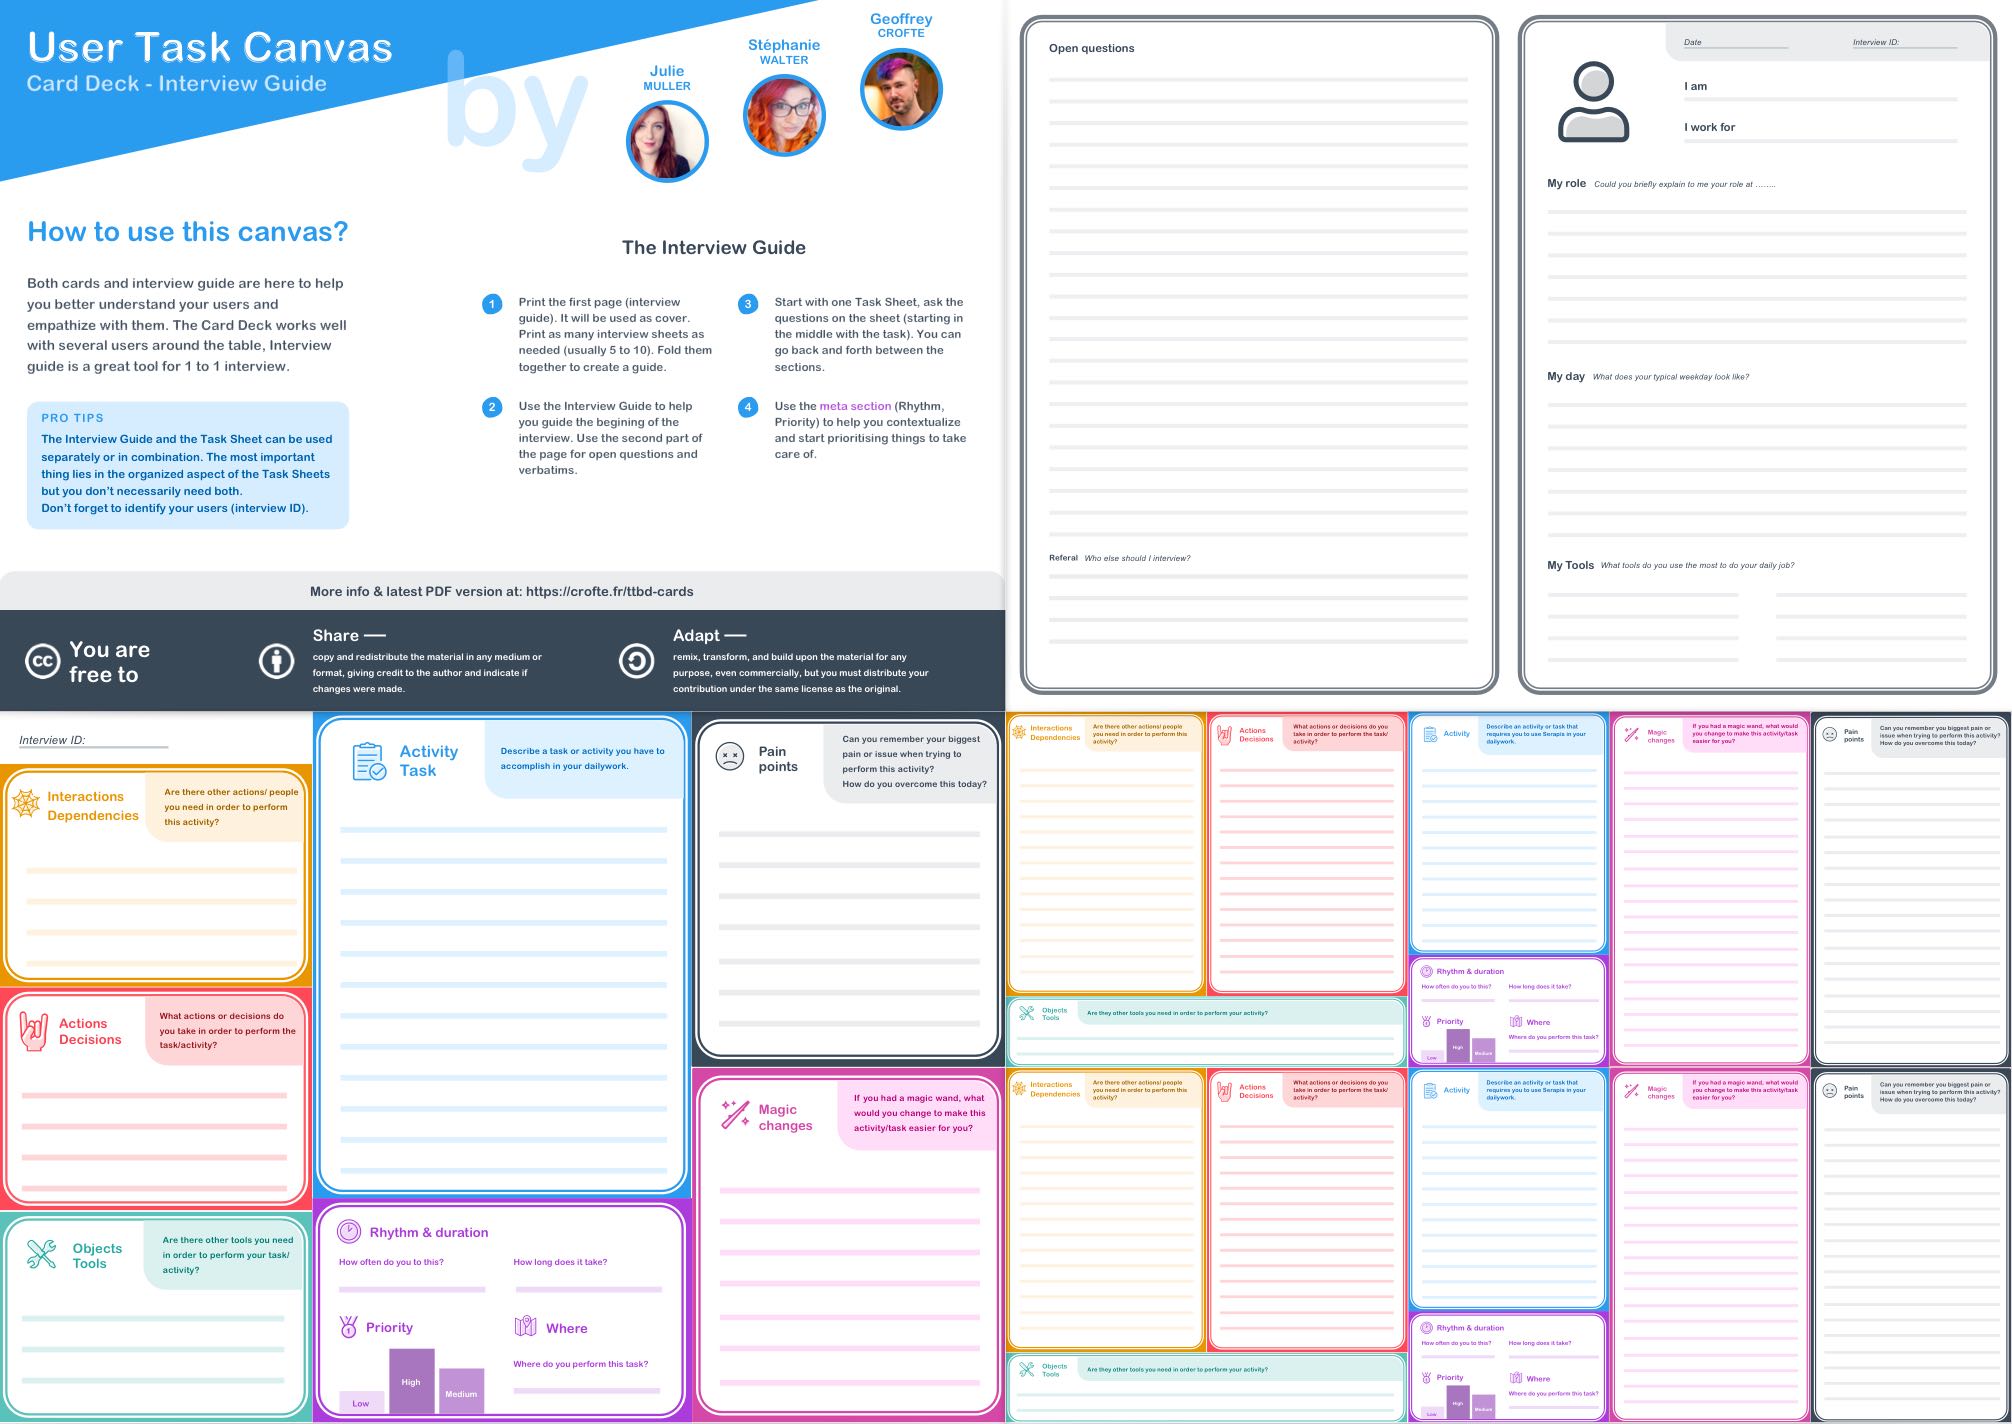
The “user interview guide” takes the form small A5 booklet you can print. It’s dived in 2 parts:
- The cover helps you collect information about the users: role, daily life, tools (and an open-ended question section).
- A4 “Task sheets” lets you gather all the information linked to the user tasks on one single sheet.
The format is therefore a little different from the cards. It was designed to be used in 1 to 1 interview. It gives a common base so that different people in the same research team can conduct structured interviews and then share and compare the results with each other.
How to use the interview guide
Here are some tips for using the guide. First of all remember: this is an interview, basis user research rules apply. Ask open-ended questions as much as possible, try not to bias your users, etc.
- Print once the 1st page (the grey one). You will need one per user interview. It will be used as a cover. Fold it in half.
- Print several task sheets and slide them into the cover to create a kind of A5 guide (Stéphanie: “In my experience, I needed between 3 and 6 per user on my last project”).
- Start the interview with the first page of the grey cover. This lets you to better understand the person but also to put them in the “mood” for the rest of the interview.
- For each task of this person, use and fill in a A4 task sheet (Stephanie: “The purpose is to use this template as a guide, but remember that this is an interview: it’s supposed to be a discussion. Fill the boxes as the conversation progresses but don’t force the structure. Even better if you can have one person taking notes while filling in the template and another one leading the discussion it’s perfect”)
- At the end of the interview, return to the second half of the cover page for some open-ended questions.
- When you are finished, always remember to thank the users for their contribution and help. Fold your task sheets and put them the grey cover so that your don’t lose anything. (Stephanie: “I recommend scanning them ASAP to make sure you REALLY don’t lose anything”)
There you go! You will quickly find the information on this user.
Do not forget to identify your users either with a name, or with a number if you anonymize the data. There’s an identifier field on all pages for that purpose.
Download the interview guide
You will find here the last version of the guide. Be careful with the license
It is a first draft.
Feel free to comment and share your use cases with us, here or on BlueSky with Stéphanie Walter or me (Geoffrey Crofte). We even invite you to share your experience while quoting this article to always mention the original source. Here is all you need to know about the licence:
License of the files
Some simple rules to respect. Those files are under the CC SA-BY 4.0 License. Thanks for reading the details of the license and the following:
- You can use these files even in a commercial context, as long as you respect the different Licenses available on the tool’s page.
- You can modify and adapt these files, but you are required to specify the modifications made in order not to assign them to the original authors (us).
- You are required to cite the original authors of these files (Stéphanie Walter, Julie Muller and Geoffrey Crofte) and to link to this article or the link at the bottom of the page of the downloadable PDFs.
- You are required to share your creation and modifications under the same license.
- You are not allowed to apply legal conditions or technical measures that would legally restrict others to use the Work under the conditions described in the license.
Thanks for us and have fun!
Post a comment for this article?
Follow comments and trackbacks